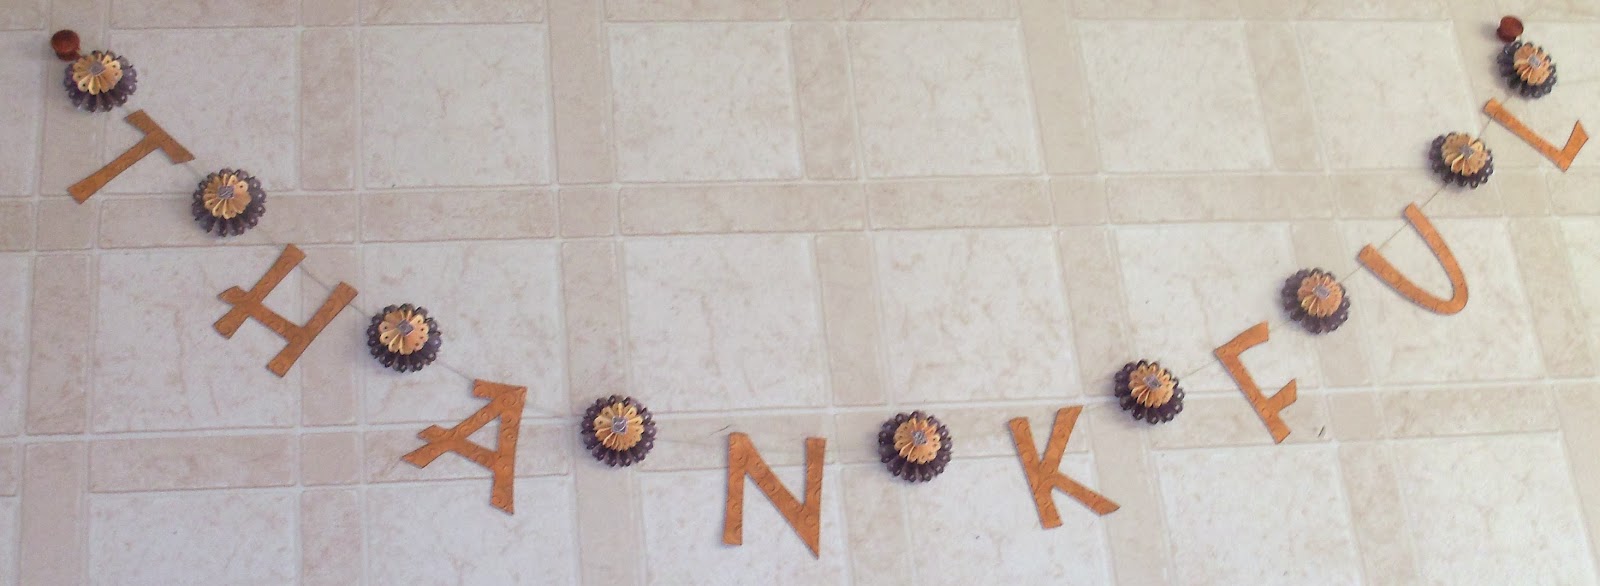
I love how this banner turned out!
To make this, I cut the letters on my Cricut at 4" out of white cardstock. I used a Pumpkin Pie inkpad from Stampin' Up to color the cardstock. I tried layering these letters on colored cardstock but I had trouble finding a shape I liked for the base. So after countless attempts to make it work I opted for just showcasing the sentiment on its own. I think it turned out pretty well. I used white so I could customize the orange color. It's a great trick to use when your running low on a particular color of cardstock. Once dry, I used my D'Vine Swirls embossing folder to give the letters added dimension. To highlight the swirls, I used a brown inkpad to sweep color over the letters to make it stand out. To finish it off, I inked around the edges using the same brown inkpad.
I wanted to add an embellishment to the banner to tie in the other fall colors I used. I decided to go with a layered rosette. Here's a close pic of that:

I used patterned brown and yellow cardstock to create this. For the yellow rosette, I cut a strip at 1 x 12" and used my threading water punch to add a decorative border. I added this leaf I stamped on a separate sheet to the middle. For the brown rosette, I cut a strip at 1 1/2 x 12" and used the same punch for the border. After forming the rosettes and hot gluing everything down , I layered the yellow rosette on top of the brown. This is a nice touch that adds another element to the banner.
To assemble, I just hot glued the letters and rosettes to a piece of braiding cord making sure to leave a 1/2" space in between. And that completes my banner! All that's left to do now is hang it.
I hope you all enjoyed this project. It's a different take on a traditional banner. I love how it turned out and the design couldn't be any simpler. I think I'll try to make a few for christmas and see how I can change it up a bit. I will end this post here for now and hope you all enjoy the rest of your evening! Peace!! :)
I

No comments:
Post a Comment